Showing posts with label card making. Show all posts

Thursday, 19 June 2008

Thursday and Its This Thursday its all about.... Fresh 1st Challenge

Wow its been so exciting working on the new challenge, and its finally here. Our 1st challenge is fresh . It can be fresh techniques, fresh products . the word or whatever else fresh brings to mind I love my design team mates work and here is mine. As you can see I got a bit carried away and have made loads of stuff, to see my other peices , design team examples and some free downloads as well go to

http://www.thisthursday.wordpress.com/


This is my 1st Fimo plaque I made some fake malacite for the base, I will be doing a tutorial for Fake malacite and other fimo techniques on This Thursday at a later date . I ran my fimo through a pasta maker to condition it and also to get a consistant thickness. I also used Liquid fimo to which I added a tiny spot of alcohol ink to tint it to create the blue and green tinted glazes. This is put onto the Plaque after the oven and then cured with a normal heat gun I inked around the edge of the white plaque with one of the colorbox queue Rain Forest ink pad which is part of the great prize supplied by Craft 4 Creation all my examples use the queue ink pads except the Digi layout

This is a daisy pyramage There is a round version of the pyramage sheet available for download free on This Thursdays freebee page and an equivelant GSD file for all craft robo users
This card I directed tapped the ink pads onto a cuttlebug embossing folder. Then embossed onto white card. The I inked over the raised pattern with black ink. then cut out the two main shapes. Then punched two circles. I used the corners as added detail on the card. Oh and of course added the fresh as a daisy
This Digi Lo I wanted to find out if I could paper peice digitally this is my 1st attempt. I used the word and the defintiton for Fresh


There are a couple more examples on the challenge including a clipboard with Inked Grungeboard letters oh and a project using Cuttlebug embossing .


Well thats This thursdays, 1st challenge can't wait to see your examples, and I am hoping to catch up with some challenges that i have missed over the last week


Here is todays free paper

If you like it you can download it free here FREE PAPER DOWNLOADS

There are also more free papers on This Thursday, its all about..... Freebees page

Thursday, 3 April 2008

Ist example for Competition. Big card trend challenge for an early draw entry

Since seeing some of the extra large cards that seem to be the new trend in cardmaking, I have been meaning to try big cards for a while so this morning when I was contemplating what to create for my 1st example of a competition entry it seemed the obvious choice .


So here is my 8 by 8 card


Using Dovecraft 8 by 8 Paper pack Charcoal Prints by french Designer Sandra Ranarison (which was in the Dovecraft Spring promotion goodie bag with loads of other great bits and i loved the bag too. Am going to try and alter it ) but you can buy the papers seperatly
The ribbon across the card is cut from one of the sheets of paper. The centre of the flower is Dovecraft charm brad. available in sets of six HERE.

The Big flower (5 inches in diameter) was one I got by taking a pound shop large peony head to peices. I always go to the pound shop for artificial flowers to take to bits. Small black flower was from my stash . I added diamonte gems to the centre of the printed flower and across the paper ribbon. I also added a paper ribbon to the back.


To make an 8 by 8 card blank . You need 2 peices of A4 card . Cut one peice into an 8 by 8 square. With the paper portrait place it in your cutter and cut to a width of 8 inches.


With your score board ( no matter which one you use) place short side of paper against the stop. Then score on the 1st score line. Fold at score line. With score line folded place card into your trimmer with unfolded edge on the side to be trimmed. Place fold along 8 inch mark and trim.


Take your card with the fold and place fold on right hand side and open out fold. Place glue, doublesided tape or tape runner along the small flap created by the fold. With the flap slightly folded, position the 8 by 8 peice so that it butts up to the crease and the flap is behind it. then press to adhere. Cover over join with co ordinating ribbon or paper or use a peel of border along the edge


You now have an 8 by 8 card blank. For an easy background take an 8 by 8 peice of paper and trim 10mm or a 1/4tof an inch (depending on your mesurement prefference) from the top edge and one side edge. If your card has a border trim all sides by either 5mm or 1/8th of an inch .


So thats todays example. If you want a Challenge make an 8 by 8 card yourself , if you make an 8 by 8 card and link it here you will get 1 early entry into the draw. If it has a Dovecraft product on it and you mention it , you will get 2 free entries into the draw. I will pick my favorite and they will get an extra 5 tickets in the draw. Challenge will run to the 14th instead of the 7th (this has been requested to give poeple a chance to go shopping for dovecraft products) then I will post another and that will run to the begining of the competition.


If this is your 1st time on my blog, and your wondering about the rules and prizes for the competition check out my last two posts for information


I said yesterday that I would post a photo of the Dovecraft Laura Ashley 6 by 6 contemporary papers that is part of the craft entry Draw prize . So here they are


I will post the links to the 1st 10 entries blogs here
For the love of paper and all papery things blog and entry
MagicDivas blog and entry
Rosies altered (T)art and stuff blog


I have also got a freebee paper for you. Another in the floral avoidance set

If you like it you can download it here Free Paper Download


See you tommorow with the Die cuts with a view Rock star Card Project with downloadable project sheet. If I get time I will do some more examples using Dovecraft products. Oh and there will be another paper in the floral avoidence set.

Tuesday, 16 October 2007

Tuesday 15th October Craft Robo Cards

Well as my project is coming out in Simply Cards and papercrafts on the 18th featuring the Craft Robo I thought I would put a couple of Craft Robo Cards on my blog. I had been commisioned to do a 30th bithday femail and a 1st wedding anniversary card . so had a look on UK scrappers and found templates for shoes, and a template for a stunning wedding card. So decided to do those two.

The small tag reads congratulations on your 1st anniversary, and the second reads with all our love. This was from a stunning template on Uk scrappers by Jennie Bean to be honest I did nt have to do much to it at all. I printed the love quote on acetate then adhered it in the apeture. I used the craft robo and pen holder and pink sakura to write the tags and the couples name on top of the cake. I used Heidi Swapp thin pink Decorative dots tape it comes with a thick black and white polka dot which is ace and a medium pink stripey but this ultra thin ribbon was just perfect and I must admit it was great value at £3.50 at www.craftycarrot.com . Love the seloptape style dispenser as well.

Have had my Craft Robo for a year now, and cannot believe how useful it is. Ive cut peel offs to my own design, cut die cuts that I just could nt get anywhere else, used it to do decoupage, used it to write fonts in Sakura pen, cut appertures, cut words, best thing I ever bought. with so many free templates on UK scrappers as well its ace, anyway


This was from a great template from ErikaP again on UKscrappers just the shoes.

I cut them in K and co doublesided can't remember which stack it was from. Designed box to fit and look a bit like a shoe box. I wanted the whole thing to look like an expensive make of shoes, and the card inside to look like a promotional card from the makers, celebrating 30 years. Inside it has Have a great day and space to write a personal message . Think it worked very well

The lady who ordered them was really pleased.

Anyway I have a freebee downloadable paper for you again


If you like it you can download it free Free Paper Download

Don't forget to comment to be in with a chance to win the English Paper Company Christmas Collection 12 by 12 pack of 72 papers.
Catch you later

Monday, 15 October 2007

Monday 15th October Papercraft Junkies Challenge

Hello everyone its Papercraft Junkies Challenge day again
This weeks challenge is Autumn, so use Autumn colours or themes, whatever autumn reminds you of. I love Autumn colours so again have a few examples. I took 6 Autumnal papers to work and just played around with them, This is what I ended up with


For this I used a leaf punch and a circle punch. I punched the leaf 1st then punched a circle around it with the punch held upside down so you can see where you are positioning it. Really easy but effective. Then placed the circles over a strip of textured gold card. Used the leaves that were punched out and a few more. Quick and simple card


This is the same basic technique only this time I punched a small circle. then puched the other circle off centre. This time I matted them twice and created an oriental feel.

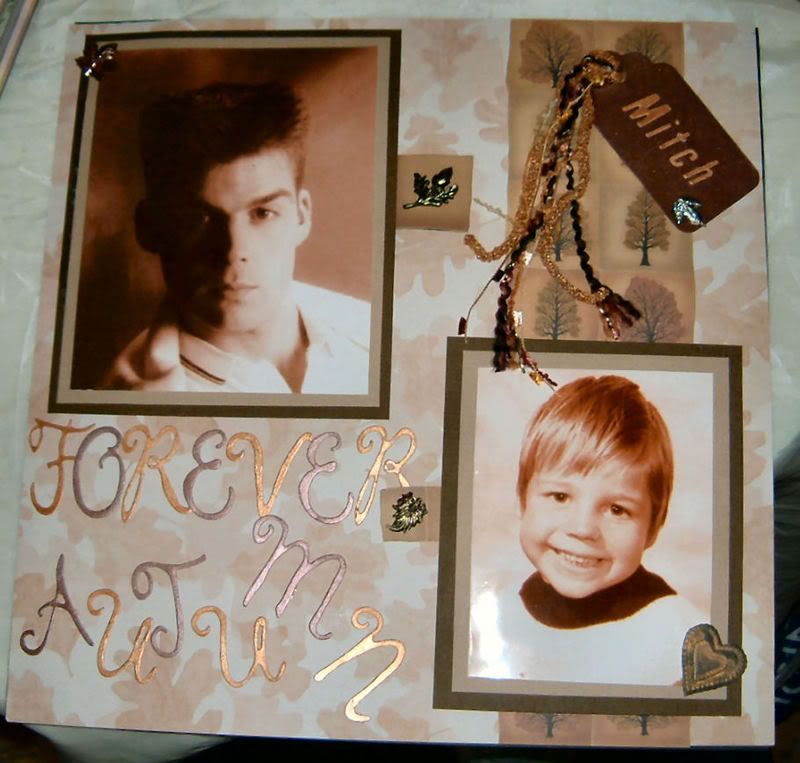
Ive had a set of Autmn papers for 2 years, used a few when I 1st got them, for this layout


then saved the rest becuase I wanted to use them on another special project. However I still had quite a few So I decided to use some of them to create a mini book, and used the left over peices to create 2 more cards . I still have one of each of my favorite papers set aside for something really special. .


I cut out 3 of the tree designs on one of the papers, they had wiggly edged boxes around them
I used a Dovecraft chipboard ribbon slider sticker (although if you ve noticed the Papermania ones are exactly the same) Used the backing paper to make a ribbon . Thats it basically


This is the cover of the mini book I have made, although I must admit its not finished yet. I ve covered all the pages, but I want to fill it with pics I take this autumn and quotes. and finally


Used a thin strip of the remaining peice of my favorite paper, there wasn t much left as its mostly in my book., and two other strips, and placed them at bottom of card. Then used a chipboard slide mount around the remaining peice of my favorie paper . added brads and attached to top of card. This is a great way to make the most of your favorite papers. Even though there is not much of that paper left both peices really stand out as the feature of the card

Don't forget that my very tallented design team mates examples for challenge 10 can be seen HERE and if you enter you could win a 15% discount from at www.craftycarrot.com.
As usual I have created a themed paper for you to download


available to download Free paper Download

and don't forget the more times you comment on my blog the higher your chance of winning this months Blog candy giveaway, in time for christmas crafts and cards. A full 72 paper pack of the complete English paper company Christmas collection. Spread the word on your blog, add a comment here with link to your post and you get an extra 2 tickets in the blog candy draw.
Anyway thats me for now
Catch you all later

Tuesday, 2 October 2007

Tuesday 2nd October

BLOG CANDY GIVEAWAY ANNOUNCEMENT
Hello all I have decided that I am going to try and giveaway a Blog candy every month. So each month I will put all the comments from my blog posts into a hat and draw a winner.
This month the Blog Candy has been donated by The very kind English Paper Company
With Christmas coming up they have very kindly donated a whole 12 by 12 stack of their Christmas collection (which can be seen by clicking on the above link) There you will see the six design ranges that the whole collection encompases. With something for everybody it is ideal for cardmaking and scraping.
I have made some examples using the Winter wonderland and festive frost selections.


On the angel card I have used one paper as a backgound , tore the angel from another paper and the word Angels sing and adhered with Silicon then I only added some gems. On the star boxes I have added peel off borders and gems. On the flower card I just added the flowers and leaves and on the frost I added sakura to the bow and peel off border and the sparkles either side of the frost. These papers are so versaile to many different uses, but importantly you can get very effective looks with very little work. Great if your mass producing your Christmas cards. Great for Chistmas giftboxes and bags.
Next week I will have examples from the other selections.
I am quite happy to post this to anywhere in the world so please feel free to take part no matter where you live. for every comment on my blog posts between 22nd Sept and 25th October you get one entry into the draw.

Next month I have another great giveaway as well which I will announce sometime next week

I also have two .Yes two free papers (my original designs not the English paper Companys designs (just to avoid confusion) for you today. I love the artworks of Klimt and these papers are inspired by his work.


available to download HERE

avaliable to download HERE

Monday, 27 August 2007

Monday 27th August

Papercraft Junkies challenge day again. Papercraft Junkies forum .Papercraft Junkies is the sister site of Crafty Carrot a great online shop owned by Tracey who's blog is here
As you now know, we are a very varied design team with everything from Atcs to Srapbooking and altered art included. More often than not we get carried away and have more than one example each for the challenges. So here is the challenge Something Old, Something New.
It can be old stash, new stash. Whatever old and new brings to mind. Wedding related. Grandparents with new grandchild. My 1st example is old stash new stash and old love new love.


Its my anniversary card for oh . Starting point I dug down to the bottom of my oldest stash box and took out the bottom paper. When I saw it . I thought it was a bit girly for a male anniversary card, however I think that the slightly oriental feel to the card. strengthens it. The Lillie's I bought when I 1st started card making . I bought a job lot of flowers and ended up with 100 lilies, of which I have probably used 10 all on sympathy cards. So that's the old. The new is the papermania chipboard stickers and reasonably new are the K & Co papers. It doesn't close flat so its a boxed card.

My second example is an old ufo in fact my 1st unfinished layout.


I had the two papers and the fibres done and the photos were adhered with re positionable in the center, Sometimes when I am planning I place repo in the center of my matted photos and then just move them around. When I am happy I can add glue to the edges of the photos without moving them. However the repo was nt very re positionable anymore well it was about 3 years ago that I did it. So that was my starting point. The new is the little metal flowers which I bought at a bead fair , The small photos are enlarged sections of the paintings in the main photo. I liked the subdued effect the blurring created.

So that's my two examples

Don't forget you can enter the challenge yourself at papercraft Junkies.
So go along to the forum and look at all Papercraft Junkies talented design team team mates wonderful examples. If you enter the challenge yourself , there is a 10% discount voucher for the best entry chosen by the design team.available to Uk and non uk residents .
My Design team mates blogs are all in my links section
Come along to Papercraft Junkies Challenge thread to see all the design team examples and join in the challenge for a chance to win a 10% discount at Crafty Carrot online shop

I also have a something old, something new freebee paper download for you
I started by photographing an old crochet doily to create this new paper for you

available to download HERE

Monday, 13 August 2007

Papercraft Junkies 1st Challenge Monday 13th August

Well today is the 1st challenge appears on Papercraft Junkies forum .Papercraft Junkies is the sister site of Crafty Carrot a great online shop owned by Tracey whos blog is here

The challenge is summer weather and here are my examples for the challenge this week .


Indian Summer pendant *well we are all hoping for an Indian Summer)


Quick Atc the using the phrases Summer Breeze,Summer Rain and Summer Sun. I decided to add umberellas as boats bobbing along because of all the rain we ve had this summer.


Thank you card using the verse from Summer Breeze (I think by the Isley brothers but could be wrong) Summer breeze Makes me feel fine, Blowing through the Jasmine in my mind. So used a picture of jasmine as the main part of the card. (I have always loved this line it always reminds me of summer and I love the smell of jasmine there is nothing quite so exotically, stunningly aromatic)


Quick summery get well card.
To see all the other team members wide variety of entries (including scrapbook Los, Atcs and cards ) look in the
Papercraft Junkies Challenge Thread and enter the challenge for a chance to win a small prize. You must register on the forum to enter the challenge. New registrations moderated daily Look forward to seeing all your lovely work. All entries for challenge must be in the challenge thread on Papercraft Junkies to be eligable to win.

All design team blogs are also in my link section
and as an added bonus I decided to design a 12 by 12 paper based on the theme Summer weather

which is available for download HERE
See you next Monday for next weeks challenge which I must admit to being really inspired by, so much so ,that I started it within 30 mins of getting the challenge. Must also admit to being really pleased with 1st example but will probably do one or two more before next monday. Be seeing you then.

Saturday, 4 August 2007

Yippie

Well its now all official, and I can announce that I have been chosen as part of the Papercraft Junkies Design team.Papercraft Junkies is the sister site of Crafty Carrot a great online shop owned by Tracey whos blog is here I would also like to congratulate all my fellow Design team members
Fiona Haigh-Gannon (Fe-Fe)
Jayne Loughlin (jay670120)
Melissa Smith (melissa)
Natalie Jubb (NatBag)
Paula Whittaker (BettyBoo)
Taslimah Dauhoo (Tassy)

Paper Craft Junkies is a crafters forum, so come along and have a look. Well we have chosen the 1st challenge, and I have already had a play. I have really enjoyed it so far and there are one or two peices vieing to be my final peice. The 1st Challenge will be announced and the Design team examples will be on the forum on the 13th August pop in and be inspired. We are a varied team so expect to see altered art, atcs, scrapbook layouts and cards. So no matter what your crafting adiction is there should be something for everyone

I also would like to share my 1st Canvas. Which I really like. Can see myself doing loads of these. Watch out friends and Family I see Canvases for Christmas


Also playing with framed los . so will enjoy that as well

Thursday, 28 June 2007

Fridays Challenge 15 or 40 min Tidy up challenge

Well I am again out most of Friday so posting Fridays dare early. I have been tidying up my craft room and came across some unfinished bits and peices. The green with the ribbon was a section I did for a scrapbook page but did nt ge the shape quite right. The card blank was left over from a star book I made. The flower head was one remaining from a bunch bought at the £1.00 shop. I kept the middles thinking I would use them for something and never did. The love is a remaining peice of rub on and the chipboard it is on was an offcut from I can t remember what. The peice of paper was a small peice remaining from another layout. I went through my uncompleted bits and scraps piles just pulling out bits that I thought would go. ended up with three piles. One Acids, one red and black, and one blues and greens. The acid pile really shouted at me so that is what I went with. I gave myself 15 minutes to come up with a card from the pile.
So the challange or dare is Take 15 mins to complete a card from your bits peices and unfinished stash, or 40 minutes for a scrapbook lo.
Sometimes I just like the freedom that no time gives you.


Dont Forget DARE TAG starts on my blog on Wednesday 4th July

Sunday, 10 June 2007

So its a Sunny Sunday in Crewe and I have the flu

Just worked out that I must do something about my office. Which is south facing and just under my victorian tiled roof. Its 10.21 and its already like an oven . I'll be typing an a bikin at this rate . Fortunatly all, I have no intention of inflicting any pictures of this on any potential readers of my blog.


Plans for today. Get better.


Possibly do some scrapping , most probably digi as I'm not up to digging out the numerous bits that as always will be in the bottom of my stash. Although I do have the urge to handle paper .


Thought I may show you one of my favorite things. Patterned paper medallions. I sometimes cut them into four and use them as page corners which can be very effective,or just as embellishments for my pages For examples though I have two cards and instructions


Patterned paper medallions. This is a great technique to use up your scraps of patterned paper. I used DCWV papers that co-ordinated but you can experiment with any patterned papers


Patterned paper Medallion pop-out card.

A5 Pale blue cardstock
Pocket full of posies papers DCWV
Dancing on air medallion stamp
Black glitter embossing powder
Black or versamark embossing pad
Orange and green starburst Sakura Pens
Dark Blue Marvy le plume pen
Word stamps of your choice
Topscore multiboard
5-mm double sided tape
Hi tack glue
Foam tape, foam pads or silicon glue
Scissors

1. With your Multiword score an A5 gatefold card.
2. Turn card over and now score on the tri-fold A4 line, Rotate card and score on A4 tri-fold again.
3. Take the white fronds paper from the Pocket full of posies pack, Measure the inside and outside flaps should be approx. 2 inches. If using 12 by 12 paper cut 2 strips approx. 2 inches (your measurement) wide > If you are using the 8 by 8 papers cut 4 strips approx. 2 inches (your measurement) wide.
4. Adhere card to flaps with double sided tape
5. Measure the central spine. Should measure just over 1 cm. Cut strip 1 cm wide of the white fronds paper and using hi tack glue adhere to central spine. Stamp your words in Blue Marvy le plume pen
6. Take the small chalk style flower paper, and ink up whole of medallion stamp. Stamp once and emboss with black sparkle.
7. Ink up the 3rd section from the middle just going over the edge and stamp once onto chalk style paper and emboss with black sparkle
8. Ink up centre flower and emboss with black sparkle.
9. Take the bright flowers on green paper. Select a colourful section of the paper. Ink up the pointy petal section of the stamp and stamp onto colourful section.
10. Ink up the small round flower section of the stamp and stamp onto colourful piece of the paper and emboss with black sparkle.
11. Cut out all stamped medallions.
12. Using orange Sakura starburst pen colour centre of small flower
13. Colour the Petal shaped sections of rosette shape. Colour the flower heads on the pointed petal section and the ducktail sections on the full medallion
14. With the green Sakura pen colour the border of the four frond decorated sections on the full medallion and the leaves of the flowers on the pointed petal section
15. Layer the medallion as normal
16. Take 5 mm double sided tape across the back of the medallion from one of the four decorated points to the opposite decorated point
17. Place medallion on the spine of the card in line with the double-sided tape. So tape runs up the spine
18. Close card. Cut a 1-cm strip of the chalked flower paper. If you are using 12 by 12 you will only need 1 strip. If using 8 by 8 you’ll need 2
19. Fold strip in half; (if using 8 by 8 papers then glue second strip with 1-cm overlap to 1st strip at one end after folding). Open and place crease over join in card front. Holding card and strip of paper at centre fold strip tightly over both edges of the card. Hold in place and turn card over using a small dab of hi tack pva glue join strip at back. Wait till it dries then cut of any excess and slide card out.
20. Ink up medallion stamp with black ink, just the floret section and stamp onto chalk flowers paper. Then ink up small round flower section and stamp onto white fronds paper. Then ink up small central flower and stamp onto chalk flowers paper.
21. Using small dabs of glue instead of foam tape layer medallion as normal
22. Attach flat medallion to 1-cm strip over joined area. Centrally on band
23. Slip back over card.

In a jiffy, patterned paper medallion card. (Suitable for the complete novice)

Supplies
A4 Hammered cream cardstock
DCWV Spring paper pack
Dancing on Air medallion stamp
Grey, pink and blue starburst Sakura pens
Foam tape, pads or silicon glue
Topscore multiboard
Double sided tape
Scissors
Pencil and eraser


1 With Topscore multiboard with line names near you, score your cream cardstock once on the tri-fold A 4 line. Close and crease with bone folder. Trim of excess card

2 Take the Pink s shaped lines paper and cut along right edge of a dark pink line, approximately 5 cm’s from the left hand edge of paper. If its more than 5 cm’s across cut down line then measure 5 cms from right hand edge of paper back to left hand edge at top and trim off excess paper.

3 Adhere to left hand side of card, leaving a 5mm border, top bottom and left hand side.

4 With Grey Sakura pen place round dots along the shaped edge approximately 1 ¼ cm’s apart.

5 Take the Dances on air stamp and ink up whole stamp and stamp once onto pink s lines paper. Emboss with black sparkle embossing powder

6 Ink up the four frond decorated point’s section of the stamp, and stamp onto the polka dot paper. Emboss with back sparkle

7 Ink up Rosette section, stamp on s lines paper and emboss with black sparkle

8 Ink up small round flower section and stamp on polka dot paper and emboss with black sparkle

9 Ink up small central flower and stamp onto s lines paper. Emboss with black sparkle

10 Glue a piece of cardstock onto the back of the large medallion shape this needs to be totally adhered to the medallion stamped paper. Leave to dry Then Cut out all sections

11 Place small Grey dot of Sakura in the centre of the small flower. Take the blue Sakura and colour any two opposite long sections of the rosette. Then to make a cross colour the other two sections Grey

12 Using the pink Sakura pen colour the borders of the flower decorated areas.

13 Colour the inside section of the duck tails on the full medallion grey

14. Place your medallion on the s shaped edge with a ducktail on the top and bottom. Put a small pencil dot at each side where the medallion overlaps the edge of the card. Place a piece of double sided tape along edge of card just inside pencil dots. Erase pencil

15 Attach medallion to card with double-sided tape. With duck tails lined up with the s line. Keeping tape away from the overhanging edge. Now with foam pads, tape or silicon glue place the next biggest layer on top of the previous layer lining up the pattern. Continue until you run out of layers.


So that is my post for this morning.